Technical Notes
Deploying Llama-3.3 70B Instruct Locally: Best Practices and Guide
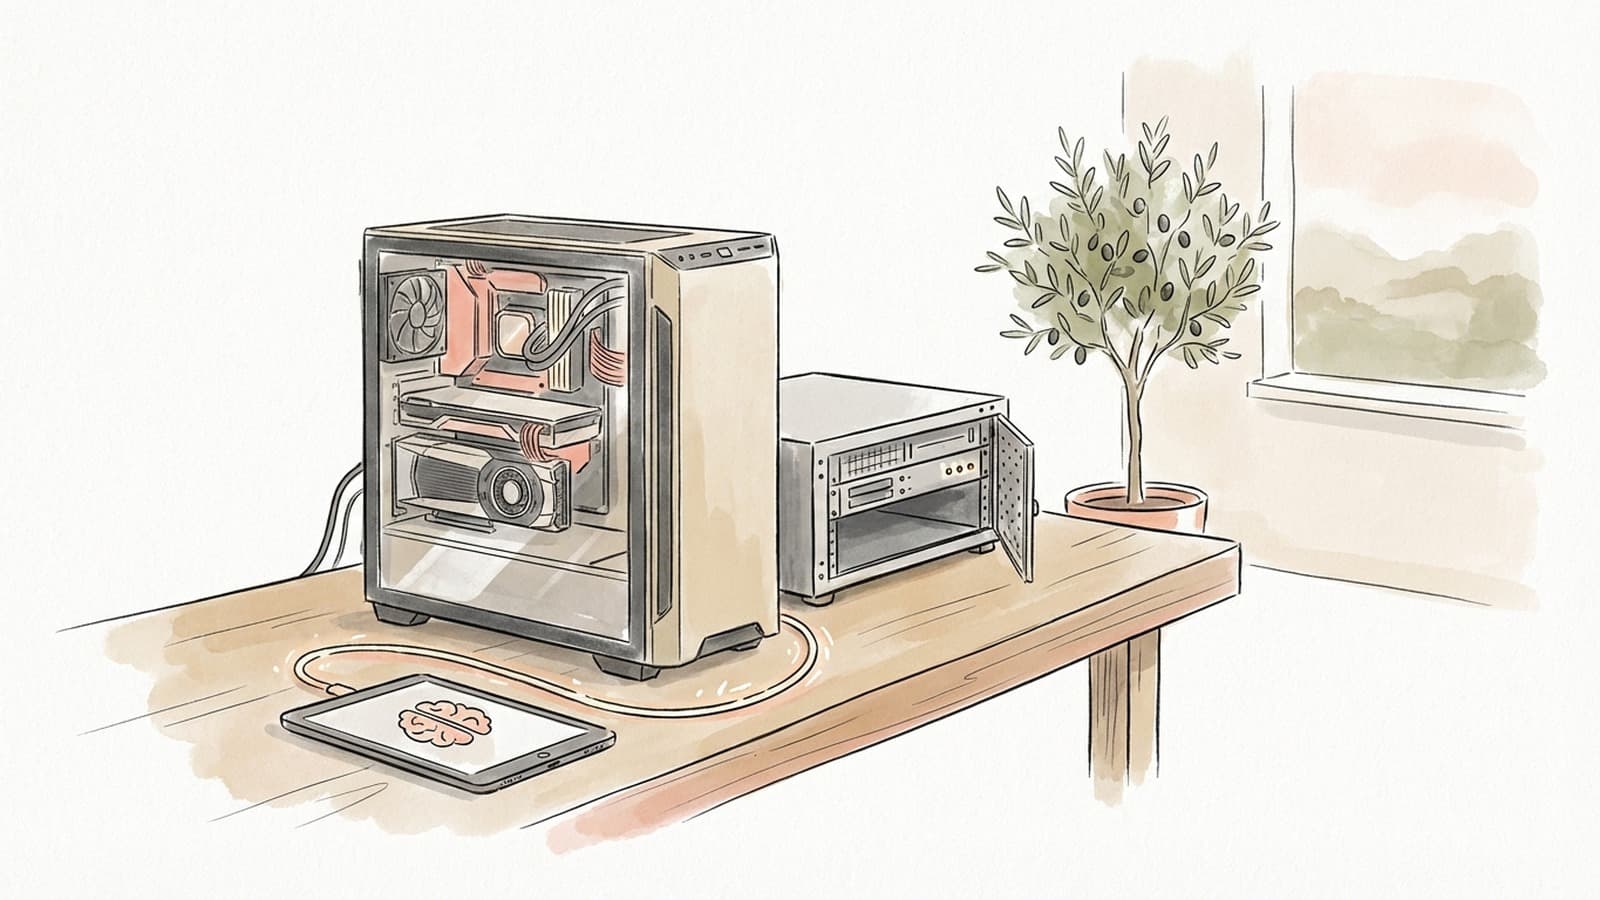
Running a 70B-parameter model like Llama-3.3 70B Instruct on a local PC is challenging but feasible with the right hardware and software. This guide outlines the recommended hardware setup for a dual RTX 4090 system, compares popular deployment technologies (GPTQ, llama.cpp, TensorRT, etc.), and provides a step-by-step deployment walkthrough. We also include a usage guide for interacting with the model via user interfaces and APIs.
1. Recommended Hardware Specifications
To achieve real-time inference at ≥50 tokens/second with a 70B model, you’ll need more than just powerful GPUs. Below are the recommended hardware components and why they matter:
-
GPUs: Dual NVIDIA RTX 4090 24GB. Two 24GB GPUs provide ~48GB total VRAM, which is sufficient for a 70B model when quantized to 4-bit. In practice, a single RTX 4090 can generate ~24 tokens/sec with a 70B model at 4-bit quantization (LocalLLaMA). Splitting the model across two 4090s roughly doubles throughput, approaching the 50 tokens/sec target. (For reference, a 70B model in 4-bit requires ~35–40GB VRAM for weights plus overhead (LocalLLaMA), which fits onto two 24GB cards.) Ensure both GPUs are installed in at least PCIe 4.0 ×8 slots for optimal bandwidth. No SLI/NVLink bridge is needed for inference (LocalLLaMA).
-
CPU: High-core-count, modern CPU (8+ cores). While GPU handles most of the computation, a fast CPU prevents bottlenecks in feeding data to the GPUs and running auxiliary tasks. An Intel Core i9-13xxx or AMD Ryzen 9 (or better) is recommended. That said, CPU requirements are modest if the model runs fully on GPUs – even a lower-end CPU with 8 cores can suffice (LocalLLaMA) (LocalLLaMA). Avoid very slow CPUs, as they could limit throughput when handling multiple threads or context processing.
-
System RAM: 64 GB DDR4/DDR5 RAM (minimum 32 GB). Sufficient RAM is needed to load the model from disk and handle the context window and OS overhead. Official guidance for running 70B models suggests at least 32 GB RAM (LocalLLaMA). We recommend 64 GB to comfortably accommodate the model file (which can be ~35–40 GB in 4-bit) and any additional memory used for caching or partial CPU offloading. Faster RAM (and populating all memory channels) can improve performance if any offloading occurs (LocalLLaMA). In a fully GPU-offloaded scenario, RAM usage can be relatively low (users have reported as little as ~6–16 GB usage when the entire model is on GPU) (LocalLLaMA), but it's wise to have headroom.
-
Storage: NVMe SSD with >500 GB free space (1–2 TB recommended). The model weights (especially 70B) are tens of gigabytes in size. For example, Llama-2 70B in 4-bit GPTQ format is about 26–40 GB per file (TheBloke). You’ll need fast disk read speeds to load the model into memory; an NVMe SSD is ideal for this. Also account for additional models, tokenizers, and OS files – a 1 TB drive ensures you won’t run out of space. Note: If using Windows, enabling a large pagefile on an SSD can help if RAM is exhausted during loading.
-
Power Supply (PSU): 1200W (80+ Gold or better). Two RTX 4090s can draw up to ~450W each under load. Add ~100–200W for a high-end CPU and overhead for motherboard, drives, cooling, etc. A quality 1000W PSU is the minimum, but 1200W+ provides safe headroom for stability. Ensure the PSU has four dedicated 8-pin (PCIe 5.0 12VHPWR) connectors for the GPUs.
-
Motherboard and Cooling: A motherboard with dual full-size PCIe x16 slots (spacing to fit two triple-slot GPUs) is required. Many consumer ATX boards support ×8/×8 bifurcation which is sufficient. Verify in BIOS that “Above 4G Decoding” or Resizable BAR is enabled to allow mapping the large VRAM address space (LocalLLaMA). For cooling, two 4090s produce significant heat – use a well-ventilated case and consider additional chassis fans. If the GPUs are air-cooled, ensure there is at least one slot of space between them or use blower-style cards to exhaust hot air. A high-performance CPU cooler (or AIO liquid cooler) is also recommended to manage CPU thermals under load.
Expected Performance: With the above setup and proper software optimization (discussed next), you can expect around 50 tokens per second generation speed. This is based on community benchmarks where a single 4090 achieved ~24 tokens/s on a quantized 70B model (LocalLLaMA); using two GPUs in parallel approaches double that throughput. In contrast, running a 70B model on CPU alone would be orders of magnitude slower (only ~0.8 tokens/s even when leveraging a 4090 for partial offload in one test (TheBloke)). The combination of dual high-VRAM GPUs and quantization is key to real-time performance.
2. Comparison of Deployment Technologies
There are multiple ways to deploy a large model like Llama-70B locally. Different frameworks and optimization techniques have trade-offs in speed, memory footprint, ease of installation, and OS compatibility. Below is a comparison of popular deployment options:
| Deployment Method | Speed (tokens/s) | Memory Usage | Ease of Setup | Compatibility |
|---|---|---|---|---|
| GPTQ 4-bit (GPU) — e.g. exLlama backend | ~45–50 tokens/s on dual RTX 4090 (approximately, using 4-bit quantized weights) (LocalLLaMA). Single 4090 achieves ~24 t/s; nearly linear scaling with two GPUs is possible in optimized setups. | ~40 GB VRAM total for model (70B in 4-bit) plus some extra for activations/cache (LocalLLaMA). Minimal CPU RAM needed since the entire model resides in GPU memory. | Moderate: Requires obtaining a quantized model (GPTQ format) and using a compatible runtime. Community tools (e.g. text-generation-webui with ExLlama) make this straightforward (LocalLLaMA). | Excellent: Fully supported on Windows via PyTorch/CUDA. (ExLlama and GPTQ libraries work on Win10/11 with NVIDIA GPUs.) |
| llama.cpp (GGUF quant, CPU or GPU) | ~0.5–2 tokens/s on CPU-only for 70B (very slow). With partial GPU offload, can reach a few tokens/s but far from real-time (TheBloke). | High CPU RAM usage: 70B 4-bit requires ~64–80 GB of system RAM (LocalLLaMA). Optionally uses GPU VRAM for some layers (user-configurable), but still needs tens of GB of RAM. | Easy: Precompiled binaries or one-click installers available. Just download a GGUF quantized model and run. No complex dependencies. | Excellent: Platform-agnostic C++ implementation. Runs on Windows, Linux, Mac (CPU). GPU acceleration in llama.cpp is limited (uses CUDA or DirectML offload for some layers) and not as optimized as other GPU solutions. |
| NVIDIA TensorRT-LLM (engine conversion) | High potential speed: Can exploit tensor cores for FP16/INT8/FP8. Without special techniques, expect on the order of ~10–20 tokens/s per 4090. With multi-GPU and advanced optimizations (e.g. speculative decoding), 70B throughput can exceed 50+ tokens/s (Blockchain.News). (NVIDIA reported boosting Llama 70B from ~51 t/s to ~181 t/s using speculative decoding on an H100 (Blockchain.News).) | ~35–40 GB VRAM needed (with 4-bit or 8-bit quantization) to store the model engine on GPUs. TensorRT generally keeps the entire model in GPU memory for maximum speed. CPU RAM usage is low. | Hard: Involves converting the model to ONNX, building a TensorRT engine, and possibly writing C++/Python code to run it. NVIDIA’s TensorRT-LLM library provides examples but setup is complex. | Limited on Windows: TensorRT is available on Windows, but most documentation and community experience is Linux-focused. Deployment on Windows is possible but may require significant effort. |
| Hugging Face Transformers (PyTorch) — Baseline or DeepSpeed | Moderate to low speed: Using PyTorch without quantization, 70B is not feasible on 2×24GB (would OOM). With 8-bit compression (bitsandbytes) or CPU offload, it may run but slowly (often <5 tokens/s). Even with DeepSpeed inference optimizations, throughput is much lower than GPTQ or TensorRT. | Very high memory needs if not quantized: FP16 70B requires ~140 GB GPU memory (impossible on this rig). A mixed setup might load ~40 GB to GPUs and spill the rest to CPU RAM (needs 100+ GB RAM, leading to slow speeds) (LocalLLaMA) (TheBloke). DeepSpeed Zero-Inference can partition the model across GPUs and CPU memory, but performance suffers if any part is on CPU. | Moderate: Transformers is user-friendly (pip installable, straightforward .from_pretrained() usage). DeepSpeed or Accelerate can auto-shard the model on multiple GPUs. However, achieving good performance requires advanced tweaking (and possibly compiling CUDA kernels). | Good: PyTorch, Transformers, and DeepSpeed work on Windows (with CUDA). However, some features (e.g. certain fused kernels or Nvidia’s TransformerEngine FP8) may be Linux-only or require WSL. In pure Windows, expect full functionality for 8-bit and CPU offloading, but slightly lower performance vs. Linux. |
Other notable options: vLLM (optimized transformer inference engine) and MLC (Machine Learning Compilation) are emerging solutions. vLLM is designed for high throughput in serving multiple queries by managing KV cache efficiently, and MLC can compile models to optimized GPU code (including multi-GPU and even AMD support). For example, the MLC project demonstrated ~34.5 tokens/s on two 4090s with a 4-bit Llama2-70B using their compiler runtime (LocalLLaMA). However, these solutions are less mature on Windows and may require Linux or specific setups.
In summary, GPTQ 4-bit quantization on GPUs stands out for balancing speed and memory usage on a dual-4090 machine, with relatively easy setup thanks to community tools. llama.cpp is simple but too slow for real-time 70B inference. TensorRT (or Nvidia’s FasterTransformer library) can be extremely fast but is complex to deploy. The standard Transformers+PyTorch approach is straightforward but needs heavy quantization/offloading to even run 70B on this hardware, resulting in suboptimal speed.
3. Summary of the Chosen Method
Recommended Deployment: 4-bit GPTQ quantization on dual GPUs, using the ExLlama backend (or similar).
Why this method? It offers the best efficiency for the given hardware:
-
Speed: GPTQ-quantized models use 4-bit weights with optimized CUDA kernels, allowing very high token generation rates. In practice, an 70B model quantized to 4-bit and run with ExLlama on a single 4090 already hits ~20–24 tokens/s (LocalLLaMA). With two GPUs sharing the load, generation speeds can reach the targeted ~50 tokens/s range. This meets the real-time inference requirement, whereas CPU-based methods or less optimized approaches fall far short. Community members have successfully run 70B models on dual 24GB GPUs with good performance – one report notes 70B models running “just fine” on two 3090s (which are similar VRAM to 4090s) using ExLlama (Hacker News).
-
Memory Efficiency: 4-bit GPTQ compresses the model dramatically (roughly 1/4 the size of FP16). A 70B model that is ~140 GB in FP16 can be ~35–40 GB in 4-bit form (LocalLLaMA), which fits in 48 GB of VRAM. This means the entire model can reside on the GPUs, avoiding slow CPU memory swapping during inference. (In contrast, an 8-bit model ~70 GB or FP16 model ~140 GB would not fit and would require swapping data over PCIe, crippling performance.) GPTQ with group-wise quantization and activation calibration preserves most of the model’s accuracy even at 4-bit precision, so quality remains high.
-
Multi-GPU Support: The chosen approach can leverage both GPUs. Tools like Hugging Face Accelerate or text-generation-webui will automatically shard the model across the two 4090s (each GPU holds a portion of the layers). This spreads out memory usage and workload roughly 50/50. Since each 4090 has extremely high memory bandwidth (~1 TB/s) (GitHub), splitting the model means each GPU can fetch weights in parallel, nearly doubling the throughput. The result is efficient scaling with minimal overhead. (If using ExLlama in text-gen-webui, the latest versions support multi-GPU sharding of 4-bit models; alternatively, using
device_map="auto"in Transformers with an AutoGPTQ model will split layers between GPU 0 and 1.) -
Windows Compatibility: The GPTQ + ExLlama solution is well-tested on Windows. It relies on PyTorch and CUDA – both supported on Windows 10/11 with NVIDIA GPUs. There are Windows-friendly projects (Oobabooga’s web UI, LMStudio, etc.) that incorporate ExLlama or GPTQ under the hood. No compilation of code is generally needed by the end-user; pre-built binaries or pip packages are available. This makes the deployment relatively painless compared to having to compile NVIDIA’s libraries or deal with Linux-only tools. For example, simply installing the latest text-generation-webui and selecting the “Nvidia”/ExLlama backend is enough to get GPTQ models running on Windows (LocalLLaMA).
-
Community and Support: GPTQ quantized models for LLaMA are widely available (many are hosted on Hugging Face by contributors like TheBloke). These come with config files that work out-of-the-box with loader libraries. The popularity of this method in the AI community means there are plenty of guides, forums, and help available if you run into issues. In contrast, more proprietary solutions (like pure TensorRT) might require debugging with less community support.
In short, using a GPTQ-quantized Llama-70B with dual GPUs is the optimal route for this setup because it maximizes inference speed while fitting within hardware constraints, and remains reasonably easy to deploy on Windows. Next, we’ll walk through the exact steps to set this up.
4. Step-by-Step Deployment Instructions (Windows)
This section provides a step-by-step guide to deploy the Llama-3.3 70B Instruct model on your Windows PC using the recommended method (GPTQ 4-bit on dual RTX 4090s). We will use Oobabooga’s Text Generation Web UI as it provides a convenient interface and manages the underlying libraries (including ExLlama) for us. Alternatively, you can set up the environment manually with Hugging Face Transformers and the AutoGPTQ library – we’ll note where steps would differ for that approach.
4.1 Install Prerequisites
-
Install Python 3.10 or 3.11 (64-bit) – Download Python from the official website or via Microsoft Store. During installation, check “Add Python to PATH”. Python is needed to run the web UI and model code. Note: Python 3.12+ may not yet be supported by some ML libraries, so stick to 3.10/3.11 for compatibility.
-
Install Git (optional but recommended) – Git allows you to clone the web UI repository. Download Git for Windows and during setup, allow it to be used from the command prompt.
-
NVIDIA CUDA Toolkit – Ensure you have the NVIDIA CUDA drivers installed. Typically, installing the latest NVIDIA graphics driver is enough. You do not need the full CUDA SDK for inference, but having CUDA 11.8+ or 12.x compatible drivers is important. (For example, ExLlama requires CUDA 11.7+; one user noted needing CUDA 12.1 for best results (LocalLLaMA) – recent drivers cover this.)
-
Visual C++ Build Tools – (Only needed if you plan to compile anything or if a pip package requires building.) It’s often not required since precompiled wheels exist for most libraries. If needed, install Microsoft C++ Build Tools 14+.
4.2 Set Up the Text Generation Web UI
Oobabooga’s Text Generation Web UI is a popular interface for running LLMs locally. It supports Windows and has backend options for GPTQ (ExLlama), CPU (llama.cpp), etc. Setting it up will simplify model loading and provide a nice UI and API.
Steps:
-
Download the Web UI: Open a PowerShell or Command Prompt and clone the repository:
git clone https://github.com/oobabooga/text-generation-webui.git
cd text-generation-webui
(If you don’t have Git, you can download the repository as a ZIP from GitHub and extract it.)
-
Install Requirements: The web UI provides an
install.batfor Windows.- Double-click
install.bat(or run.\install.batin PowerShell). - When prompted, choose the Nvidia option for CUDA-based inference.
- This script will create a virtual environment, install PyTorch (with CUDA support) and other needed libraries (Transformers, ExLlama, GPTQ-for-LLaMa, etc.). It may ask to confirm the CUDA toolkit version (choose 11 or 12 based on your driver, e.g., CUDA 12.1).
- The script will also install the ExLlama backend extension by default, which is what we need for GPTQ models.
Troubleshooting: If the install script fails, you can manually install PyTorch via
pip. For example:pip install torch torchvision torchaudio --extra-index-url https://download.pytorch.org/whl/cu118(for CUDA 11.8). Then runpip install -r requirements.txtto get other deps. The key is to havetorchwith CUDA and theexllamapackage installed. - Double-click
-
Obtain the Quantized Model: You need a GPTQ 4-bit version of Llama-3.3 70B Instruct. If this is an official Meta model (hypothetical Llama-3.3), you might find it on Hugging Face. For demonstration, we’ll assume it’s similar to Llama-2:
- Go to Hugging Face and find the GPTQ quantized model files for the instruct model (for example, TheBloke’s repo
TheBloke/Llama-2-70B-Chat-GPTQhosts 4-bit quantized safetensors). Download the model file (usually ends with.safetensors) and its accompanying JSON config (e.g.,*.json). - Create a folder under
text-generation-webui\models\(e.g.,Llama-70B-GPTQ) and place the downloaded files there. The folder should contain the.safetensorsfile and the model’s config (JSON or TXT). Ensure the filenames indicate it’s GPTQ (the web UI will auto-detect from names like-GPTQ-4bit.safetensors).
Example: For Llama-2 70B Chat GPTQ, you’d have
llama-2-70b-chat.Q4_K_M.safetensorsandllama-2-70b-chat.GPTQ-4bit-128g.jsonin the folder. - Go to Hugging Face and find the GPTQ quantized model files for the instruct model (for example, TheBloke’s repo
-
Configure the Web UI for Multi-GPU: By default, text-gen-webui will use GPU 0. To utilize both 4090s, you have a couple of options:
- Launch args: Create a
start_windows.bat(or edit the existing one) with arguments to specify devices. For example:
The above tells it you have two GPUs with 24GB each, and to use GPU 0 and 1. (We setcall webui.bat --gpu-memory 24 24 --gpu 0,1 --load-in-8bit false--load-in-8bit falsebecause we’re using 4-bit GPTQ, not bitsandbytes 8-bit.) - UI settings: Alternatively, you can launch the UI on one GPU, then in the interface go to Settings -> System and select both GPU 0 and GPU 1 for model loading if the option is available. Newer versions allow specifying multiple GPUs for model shards.
Using both GPUs is crucial to fit the 70B model and get full speed. The ExLlama backend will automatically shard the model across the GPUs as long as it knows both are available.
- Launch args: Create a
-
Launch the Web UI: Run
start_windows.bat(or.\webui.batwith the appropriate flags). The script will load the model:- If all goes well, you should see it detecting the GPTQ model, allocating layers to GPU0 and GPU1, and finally reporting that the model is loaded. This can take 20–60 seconds for a 70B model.
- Watch for any out-of-memory errors. If you get one, you might need to free up VRAM (close other GPU apps) or ensure your launch params correctly split the load. You can also try the
--max-memoryflag to limit how much gets loaded per GPU (the remainder will spill to CPU, but that will slow things). - Once loaded, the UI will be accessible in your browser at
http://localhost:7860(by default).
At this point, you have a web interface where you can input prompts and get completions from the model. The console should show the token generation speed (tokens/sec). With dual 4090s, you should see the speed around the expected ~50 tokens/s mark (depending on prompt length and other factors, initial prompt processing “prefill” is slower, then generation speeds up).
4.3 (Alternative) Manual Deployment with Transformers + AutoGPTQ
If you prefer not to use the web UI and instead want to interact programmatically (or use a custom application), you can load the model using Hugging Face Transformers and the AutoGPTQ library directly. Ensure you installed transformers, auto-gptq, and a compatible version of torch. Then use a snippet like:
from transformers import AutoTokenizer, AutoModelForCausalLM
from auto_gptq import AutoGPTQForCausalLM

model_name = "TheBloke/Llama-2-70B-Chat-GPTQ"  # replace with actual model repo or path
tokenizer = AutoTokenizer.from_pretrained(model_name, use_fast=True)
model = AutoGPTQForCausalLM.from_quantized(
    model_name,
    device="cuda:0", use_triton=False,
    max_memory={0: "24GiB", 1: "24GiB"},  # allocate 24GB per GPU
    device_map={"model.embed_tokens": 0, "model.layers.0": 0, "...": 1, "model.lm_head": 1}  # illustrative
)
In practice, device_map="auto" can be used instead of manually assigning layers; Accelerate will then split the model across cuda:0 and cuda:1 based on memory. Once loaded, you can generate text with outputs = model.generate(**tokenizer(prompt, return_tensors='pt').to('cuda'), max_new_tokens=100). This approach gives you Python control and may be suitable for integration into applications. However, setting it up is more involved, and you won’t get the nice UI out-of-the-box.
(If using this manual route on Windows, be aware that you might not get the highly optimized ExLlama kernels unless explicitly using the ExLlama binding. The AutoGPTQ will use its own kernels or fallback to PyTorch for some ops, which could be a bit slower — but it’s still the same order of magnitude.)
4.4 Verification and Optimization
After deployment, consider these tips:
- Verify GPU Utilization: Open NVIDIA-SMI (run
nvidia-smiin a CMD window) to ensure both GPUs show memory usage ~20GB+ when the model is loaded. Also check that during generation, both GPUs have high utilization. This confirms the load is balanced. - Benchmark: Try a short prompt (e.g., “Hello, how are you?”) and measure tokens/s. If it’s lower than expected, make sure you’re using the ExLlama backend (in web UI, it should say something like “ExLlama streaming…” in the console). Also ensure no part of the model is accidentally on CPU (which would show up as low GPU utilization and slow speed).
- Adjust Settings: In the web UI, you can tweak generation settings (top-k, top-p, etc.) freely. These don’t affect speed much. What can affect speed is the context length – longer prompts or conversations mean more work per token (due to attention scaling O(n^2)). For best speeds, keep the prompt/history manageable (e.g., use a 2-4k context). The 4090s can handle long contexts, but going to extremes (e.g., 16k or 32k token context) will slow down token output and use more VRAM (LocalLLaMA) (LocalLLaMA).
- Ensure Model Quality: The instruct model (Llama-3.3 70B) should follow prompts well. If you find the responses odd, double-check you downloaded the correct quantized files for the instruct/chat version (not the base model). Some quality drop from quantization is normal but 4-bit GPTQ with act-order usually preserves quality very well.
5. Usage Guide: Interacting with the Deployed Model
With the model up and running, you have multiple ways to interact with it. Here we recommend both a user-friendly chat interface and programmatic APIs:
-
Web UI (Chat Interface): The Text Generation Web UI provides a rich interface in your browser. You can type a prompt or conversation and get the model’s response in real-time. It supports features like preset prompts (for roleplay, Q&A, etc.), adjustable generation parameters, and even plugins (extensions) for tasks like speech or image generation. This UI is great for exploring the model’s capabilities manually. For an instruct model, you can enter a system prompt or just ask it to perform tasks (“Explain X”, “Write a story about Y”, etc.) and it will follow the instruction. The web UI also allows saving chat histories and exporting them.
-
API Access: If you want to integrate the model into applications (e.g., a chatbot, or a local service), there are a few API options:
- Oobabooga’s API: The text-gen-webui can be launched with an API flag (
--api) which enables a RESTful API endpoint. This lets you send HTTP POST requests with a prompt and receive the generated text in response. The API supports parameters like temperature, max_length, etc. This is an easy way to use the model from another program without dealing with the details of the model loading. Documentation for the endpoints is available in the web UI repo. - Hugging Face Transformers pipeline: If you loaded the model in a Python environment, you can use
pipeline = transformers.pipeline("text-generation", model=model, tokenizer=tokenizer, device_map="auto")and then callpipeline("prompt text"). This uses the standard Transformers API to generate text. It’s convenient for quick integration (e.g., within a Python app or Jupyter notebook). Keep in mind that using the pipeline in Windows with GPU might not automatically maximize performance (make sure it’s using the quantized model on GPU, as set up above). - LangChain or Other Libraries: For building chatbots or agent-like applications, you can wrap the local model with frameworks like LangChain. LangChain allows you to define the LLM (with a Hugging Face interface) and then create chains or agents that use it. This could be useful if your use-case involves tools usage or multi-step reasoning with the model. Essentially, LangChain would call the model’s generate function under the hood. There are community examples of using local Llama 70B with LangChain.
- OpenAI-compatible API wrappers: Some projects enable local models to serve an API that mimics OpenAI’s API (so that existing chatbot clients or UIs that expect an OpenAI endpoint can use your model). For instance, llama-cpp-python has an OpenAI-compatible server for llama.cpp models. In the GPTQ case, you might consider text-generation-inference from Hugging Face (though it’s more Linux-oriented). If needed, you could run the model on a local server and point an app like SillyTavern or ChatGPT UI to it. This is an advanced use-case, but worth noting if you plan to integrate with third-party chat frontends.
- Oobabooga’s API: The text-gen-webui can be launched with an API flag (
-
Alternative UIs: Aside from Oobabooga’s web UI, there are other interfaces:
- LM Studio is a polished desktop application (with a GUI) that can load local models. It currently uses llama.cpp backend, which is not as fast as our GPU setup, but it’s a simple point-and-click solution. For a 70B model, it will offload as much as possible to GPU and use system RAM for the rest, leveraging Windows’ ability to use shared VRAM (DEV Community) (DEV Community). This is an option if you ever need a quick GUI and don’t mind slower speed.
- KoboldAI is another web UI (historically for story generation) which supports local model running. It has integration for GPTQ as well. KoboldAI’s interface is geared towards long-form creative writing, whereas Oobabooga’s is more general chat/instruct.
- Mobile/Remote Access: If you want to access the model from another device, you can tunnel the web UI or API over your network. Just be cautious with exposing it beyond your LAN, as these models have no built-in security or user management.
-
Utilities: Leverage features like prompt templates (since this is an Instruct model, you may want to prepend system instructions or use a specific format Meta intended). For example, Llama-2 Chat expects a prompt format with
<s>[INST] ... [/INST]tags. Make sure you’re using the right format for Llama-3.3 Instruct if provided. Often community UIs will handle this if you select the right mode (e.g., “instruct” mode vs “raw completion”).
Finally, always monitor system usage during heavy runs. Dual GPUs at full tilt can draw significant power and generate heat – ensure your system remains stable (you might run an overnight test generating a long text to see if everything stays cool and within limits).
With this setup, you have a powerful 70B assistant running locally, offering near real-time responses. You can now experiment with complex prompts, have extended conversations, or integrate the model into applications – all without relying on external API services.
Sources: The recommendations and performance figures above are based on community benchmarks and documentation. For instance, 4-bit quantization is known to fit a 70B model in ~40GB VRAM (LocalLLaMA) and yield high throughput on modern GPUs (LocalLLaMA). Running 70B on dual GPUs has been demonstrated by enthusiasts using ExLlama (Hacker News). In contrast, pure CPU or naive GPU methods are much slower (e.g., <1 token/s without GPU quantization (TheBloke)). NVIDIA’s own optimizations (TensorRT-LLM) further highlight the achievable performance with specialized techniques (Blockchain.News) (Blockchain.News). These sources and community experiences reinforce the chosen approach as the best balance for a Windows PC deployment.